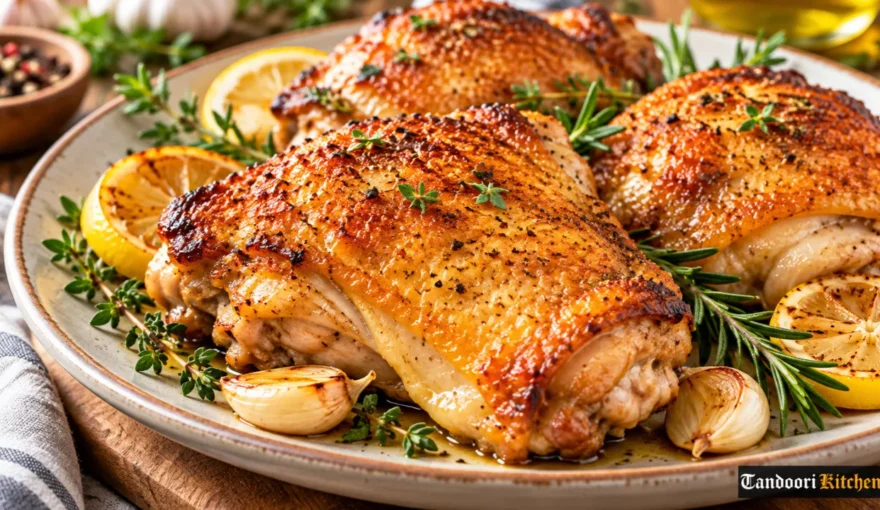
How to Make Crispy, Juicy Chicken Thighs at Home Without Using a Deep Fryer!
All you need is one heavy skillet, a hot oven, and a little patience to get golden, crackly skin and juicy meat every time.
Fried chicken is hard to beat, but most of us don’t want to heat a pot of oil on a Tuesday night. You don’t have to. Bone-in, skin-on chicken thighs can get skin as crisp as a potato chip without being dunked in oil. The method is simple: render the fat slowly, keep the skin dry, and let the heat do the rest.

Here’s how it works, why it works, and a recipe you can make on a weeknight.
Why Chicken Thighs Are Perfect for This
Thighs are the most forgiving cut of chicken. They have more fat and connective tissue than breasts, so they stay moist even if you cook them a few minutes too long. They also have a generous layer of skin with fat underneath. When that fat melts, it fries the skin from below. In effect, the chicken makes its own frying oil.
Breasts dry out quickly, and boneless, skinless thighs have no skin to crisp. Bone-in, skin-on thighs are the right choice for this method.
The Three Secrets to Crispy Skin
1. Dry Skin Is Crispy Skin
Moisture is the main obstacle to crisp skin. Water has to evaporate before the skin can brown, and while it evaporates, the skin steams instead of frying.
- Pat each thigh thoroughly with paper towels, including under any loose flaps of skin.
- If you have time, salt the thighs and leave them uncovered on a rack in the fridge for a few hours or overnight. The salt seasons the meat, and the cold, circulating air dries the surface.
2. Start in a Cold Pan
This sounds wrong, but it works. If you put the thighs skin-side down in a cold skillet and then turn on the heat, the fat under the skin has time to melt slowly before the surface sets. The skin ends up thin, even, and crackly rather than thick and rubbery.
3. Don’t Move the Chicken
When the thighs are in the pan, leave them alone. Moving them tears the skin and interrupts the browning. The skin releases from the pan on its own once it has crisped. If it sticks, it isn’t ready.
Oven, Skillet, or Air Fryer?

You have options depending on what’s in your kitchen:

- Skillet-to-oven (best results): Crisp the skin on the stovetop, then finish in the oven so the meat cooks through evenly. This is the method used in the recipe below.
- Oven only: Roast on a wire rack set over a sheet pan at 220°C (425°F). The rack lets hot air reach all sides. Expect 35 to 45 minutes.
- Air fryer: Cook skin-side down first, then flip skin-side up for the final 8 to 10 minutes at about 190°C (375°F). Work in batches so the pieces don’t touch.
Recipe: Crispy Skillet-Roasted Chicken Thighs
Serves: 4
Prep time: 10 minutes (plus optional drying time)
Cook time: 35–40 minutes
Total time: About 50 minutes
Ingredients
- 6 bone-in, skin-on chicken thighs (about 1 kg / 2¼ lb)
- 1½ teaspoons kosher salt (or 1 teaspoon fine salt)
- ½ teaspoon freshly ground black pepper
- 1 teaspoon smoked or regular paprika
- ½ teaspoon garlic powder
- ½ teaspoon baking powder (optional, for extra crispness; not baking soda)
- 1 teaspoon neutral oil (sunflower, canola, or avocado)
- 1 lemon, cut into wedges, for serving
- A few sprigs of fresh thyme or rosemary (optional)
- Chopped parsley or coriander, for garnish (optional)
Equipment
- 12-inch cast-iron or other heavy oven-safe skillet
- Instant-read thermometer (recommended)
- Paper towels
- Wire rack (optional, for dry-brining)
Instructions
1. Dry and season the chicken.
Trim any large, loose pieces of skin or fat that hang well past the meat. Pat the thighs very dry with paper towels. In a small bowl, mix the salt, pepper, paprika, garlic powder, and baking powder. Sprinkle evenly over both sides of the chicken, then rub it in.
2. Rest (optional but worth it).
Put the thighs skin-side up on a rack set over a plate or tray and refrigerate, uncovered, for 1 hour or up to 24 hours. If you’re short on time, skip this and go straight to cooking.
3. Preheat the oven.
Set a rack in the middle of the oven and heat it to 220°C (425°F).
4. Start in a cold skillet.
Rub the oil over the bottom of the cold skillet. Place the thighs skin-side down in a single layer, close together but not overlapping. Then turn the burner to medium.
5. Render and crisp.
Cook without moving the chicken for 15 to 20 minutes. Lower the heat slightly if the fat starts to smoke heavily. The skin is ready when it’s deep golden brown and releases easily from the pan.
6. Flip and roast.
Turn the thighs skin-side up. Tuck in the herb sprigs if you’re using them. Transfer the skillet to the oven and roast for 15 to 20 minutes, until the thickest part of a thigh, near but not touching the bone, reads at least 74°C (165°F). For the most tender meat, many cooks take thighs to 80–85°C (175–185°F).
7. Rest and serve.
Move the chicken to a plate, skin-side up, and let it rest for 5 minutes. Don’t cover it, or the skin will soften from the steam. Squeeze lemon over the top, scatter the herbs, and serve.
Recipe Notes
- Don’t crowd the pan. If the thighs are packed in, they steam. Use two skillets or cook in batches.
- Save the fat. The rendered chicken fat in the skillet is great for roasting potatoes or sautéing greens.
- Spice it up. Replace the paprika with chili powder, garam masala, cumin, or a pinch of cayenne for different flavors.
- Make a quick pan sauce. After removing the chicken, pour off most of the fat, add a splash of stock or white wine, scrape up the browned bits, and finish with lemon juice and a knob of butter.
What to Serve With It
These thighs go with almost anything: roasted potatoes, garlicky green beans, a crisp cucumber salad, buttered rice, warm flatbread, or a simple green salad with a sharp vinaigrette.
Storing and Reheating
Store leftovers in an airtight container in the fridge for up to 3 to 4 days. To bring back the crunch, reheat in a 200°C (400°F) oven or an air fryer for 8 to 10 minutes. The microwave will warm the chicken but leave the skin soft.