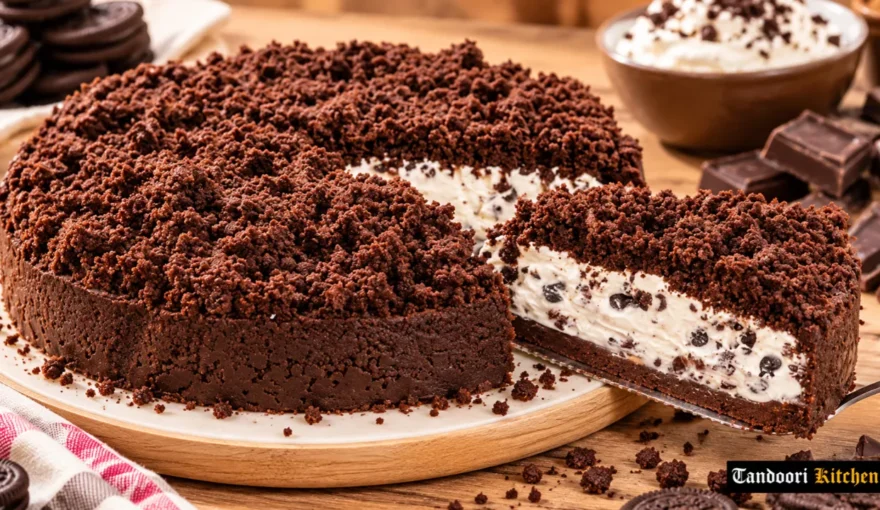
Yummy Delicious and Easy to Make Chocolate No-Bake Crumble Cake With…
Some desserts ask for patience at the oven door. This chocolate no-bake crumble cake asks for nothing more than a mixing bowl and a little space in your fridge. As a result, it has quickly become a favourite for anyone who wants a showstopper without the stress.
The idea is wonderfully simple. First, crushed cocoa biscuits meet melted butter to form a crisp, chocolatey shell. Next, a cloud-like mascarpone cream studded with chocolate chips fills the centre. Finally, a scattering of buttery crumbs goes on top, giving every slice a lovely contrast of crunch and cream.
With only six ingredients and about 20 minutes of hands-on work, this cake suits beginners and busy cooks alike. Moreover, it works for almost any occasion, from a weekend family lunch to a birthday party or a quiet afternoon coffee break.

Why You Will Love This No-Bake Chocolate Cake
There are plenty of reasons this recipe earns a regular spot in the dessert rotation. To begin with, you never need to switch on the oven. That makes it ideal for hot summer days or small kitchens.
In addition, the ingredient list is short and easy to find. Most supermarkets stock cocoa biscuits, mascarpone and fresh cream year-round. Better still, you can prepare the cake well ahead of time, so it frees you up on the day you plan to serve it.

Finally, the texture is truly special. The base stays firm and crumbly, while the filling turns rich, cool and silky after a few hours of chilling.
A Short Story Behind No-Bake Cakes
Fridge-set desserts are hardly a new invention. In fact, the “icebox cake” became a household staple across America in the twentieth century. Home cooks layered thin wafers with whipped cream and left them to soften overnight.

Meanwhile, European kitchens developed their own biscuit-based treats. Many of these combined chocolate, cream and butter into rich slices that needed no baking at all. Today’s crumble cake borrows from both traditions. Consequently, it feels both nostalgic and modern at the same time.
Ingredients You Will Need
This recipe serves 6 people.
For the biscuit base and crumble topping:
- 400 g cocoa biscuits
- 170 g butter
For the mascarpone filling:
- 250 g mascarpone
- 250 ml fresh cream (well chilled)
- 80 g powdered sugar
- 100 g chocolate chips
Equipment: a food processor, an electric mixer, a spatula and a springform pan (roughly 20–22 cm works well).
Total time: 20 minutes, plus chilling time
Difficulty: Easy

How to Make Chocolate No-Bake Crumble Cake
Step 1: Crush the Biscuits
Add the cocoa biscuits to a food processor. Then pulse until they turn into fine, even crumbs. While the processor works, gently melt the butter in a small pan over low heat. Alternatively, you can melt it in the microwave in short bursts.
Step 2: Combine Crumbs and Butter
Pour the melted butter over the biscuit crumbs. After that, stir well until every crumb looks coated. The mixture should feel like damp sand and hold together when you squeeze it.
Step 3: Build the Biscuit Shell
Set aside one-third of the crumb mixture for the topping. Next, tip the remaining two-thirds into your pan. Use the back of a spoon to press it firmly across the base and up the sides. Once the shell looks even, place it in the fridge to firm up.
Step 4: Whip the Mascarpone Cream
In a large bowl, add the mascarpone, cold fresh cream and powdered sugar. Beat everything with an electric mixer until the cream turns thick and holds its shape. However, keep a close eye on it, because overbeating can make it grainy.
Step 5: Fold in the Chocolate Chips
Switch to a spatula now. Gently fold the chocolate chips through the whipped cream. This way, you keep the filling light and airy.
Step 6: Fill the Cake
Take the chilled biscuit shell out of the fridge. Spoon the mascarpone cream inside and spread it out evenly with the spatula.
Step 7: Add the Crumble Topping
Now sprinkle the reserved crumb mixture over the cream. Cover the whole surface, including the edges, so each slice gets its share of crunch.
Step 8: Chill and Serve
Place the finished cake in the fridge for at least two hours. For the best texture, though, let it set for around six hours or overnight. Afterwards, release the springform sides, slice and serve cold.
Expert Tips for the Perfect Result
A few small details make a big difference here. Above all, aim for fine crumbs rather than chunky pieces. If you lack a food processor, simply seal the biscuits in a freezer bag and crush them with a rolling pin.
Similarly, the butter ratio matters. Too little butter leaves a loose base, while too much makes it greasy. Therefore, stop adding butter once the crumbs clump when pinched.
On top of that, always use cold cream straight from the fridge. Cold cream whips faster and stays firmer. A springform pan also helps a great deal, since its removable ring lets you serve neat slices. For extra insurance, line the base with baking paper.
Easy Variations to Try
Once you master the basic version, feel free to play around. For instance, a spoonful of instant coffee in the cream gives a tiramisu-style twist. Likewise, swapping chocolate chips for chopped hazelnuts adds a nutty bite.
Fruit lovers can scatter fresh raspberries or sliced strawberries between the cream and the crumble. Meanwhile, a little orange zest in the filling pairs beautifully with dark chocolate.
How to Store Leftovers
Because this cake contains mascarpone and fresh cream, it must stay in the fridge. Keep it covered at 5°C or below and enjoy it within two to three days. Additionally, avoid leaving it at room temperature for more than two hours, or one hour on very hot days.